Simple tips&trick on Proxmox VE
Posted on 23 June 2025 by Mino — 7 min

This article focuses on some simple tweaks I do for each new installation of Proxmox on my home setup to make my life a bit easier (f.e. user management, activation scripts, cluster directory mapping, backups, and much more...)
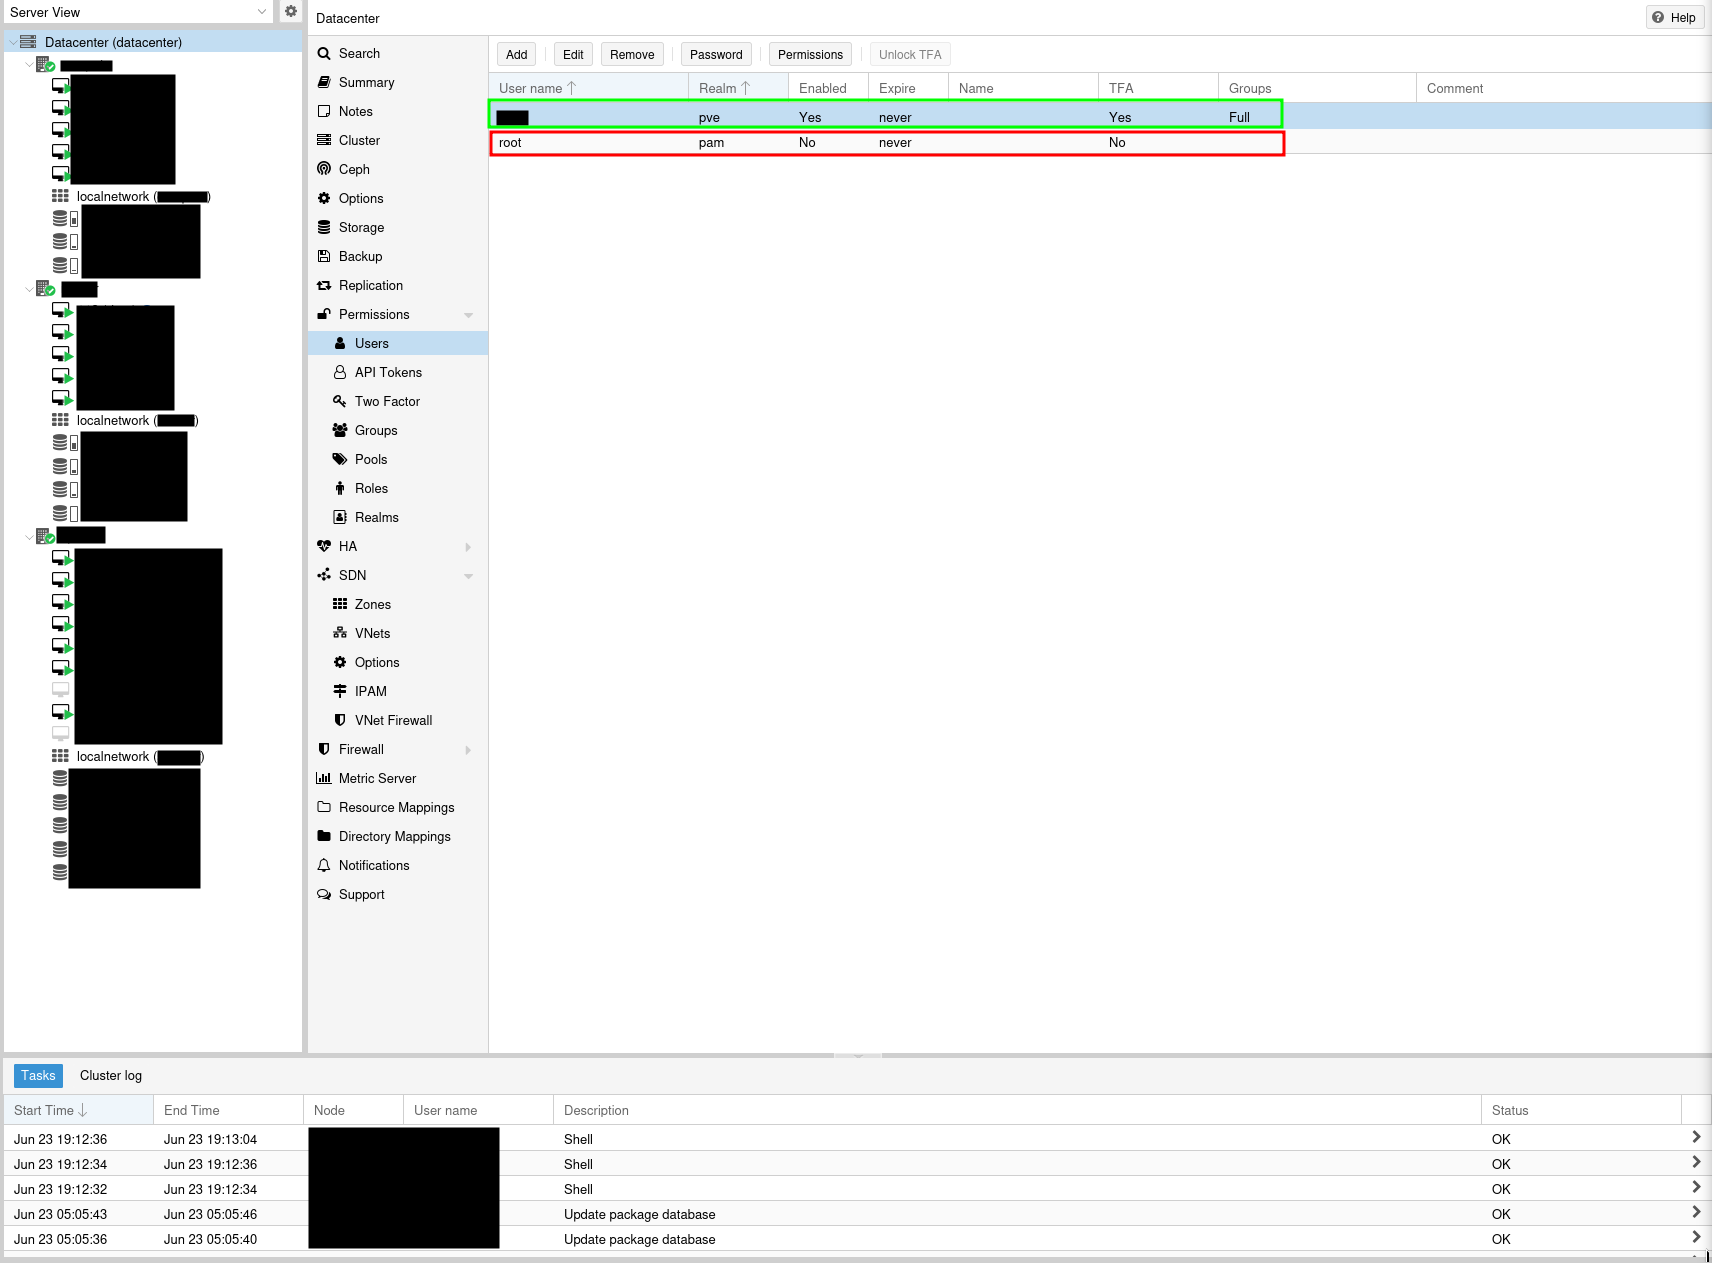
User management
For security purposes I disable the root user and only use a custom user which is from the realm of PVE instead of PAM. This has one positive and one negative side (beside others, which I did not observe yet). On the plus side, even if this user gets compromised, then the attacker should not be able to access shell even through the shell console located in the web interface for each node. On the minus side of things, not everything can be done using this user, even if you give him full permissions (from what I observed joining a cluster - which seems pretty obvious, and some tasks regarding disk operations on the nodes).
Proxmox scripts
One of the most annoying things I found when using the web interface of proxmox was the prompt regarding subscription. Luckily this awesome website saved my day. I browsed all of the scripts and found only one of them useful. This comes from a nature that I like to setup stuff my self, and some scripts I noticed there look really promising.
Post install script (located here or source code here), which if gone through line by line can be pretty insightful.
  if [[ ! -f /etc/apt/apt.conf.d/no-nag-script ]]; then
    CHOICE=$(whiptail --backtitle "Proxmox VE Helper Scripts" --title "SUBSCRIPTION NAG" --menu "This will disable the nag message reminding you to purchase a subscription every time you log in to the web interface.\n \nDisable subscription nag?" 14 58 2 \
      "yes" " " \
      "no" " " 3>&2 2>&1 1>&3)
    case $CHOICE in
    yes)
      whiptail --backtitle "Proxmox VE Helper Scripts" --msgbox --title "Support Subscriptions" "Supporting the software's development team is essential. Check their official website's Support Subscriptions for pricing. Without their dedicated work, we wouldn't have this exceptional software." 10 58
      msg_info "Disabling subscription nag"
      echo "DPkg::Post-Invoke { \"dpkg -V proxmox-widget-toolkit | grep -q '/proxmoxlib\.js$'; if [ \$? -eq 1 ]; then { echo 'Removing subscription nag from UI...'; sed -i '/.*data\.status.*{/{s/\!//;s/active/NoMoreNagging/}' /usr/share/javascript/proxmox-widget-toolkit/proxmoxlib.js; }; fi\"; };" >/etc/apt/apt.conf.d/no-nag-script
      apt --reinstall install proxmox-widget-toolkit &>/dev/null
      msg_ok "Disabled subscription nag (Delete browser cache)"
      ;;
    no)
      whiptail --backtitle "Proxmox VE Helper Scripts" --msgbox --title "Support Subscriptions" "Supporting the software's development team is essential. Check their official website's Support Subscriptions for pricing. Without their dedicated work, we wouldn't have this exceptional software." 10 58
      msg_error "Selected no to Disabling subscription nag"
      ;;
    esac
  fi
This was the most important section to me, which if narrowed down can be called pretty easily in bash without any further problems:
echo "DPkg::Post-Invoke { \"dpkg -V proxmox-widget-toolkit | grep -q '/proxmoxlib\.js$'; if [ \$? -eq 1 ]; then { echo 'Removing subscription nag from UI...'; sed -i '/.*data\.status.*{/{s/\!//;s/active/NoMoreNagging/}' /usr/share/javascript/proxmox-widget-toolkit/proxmoxlib.js; }; fi\"; };" >/etc/apt/apt.conf.d/no-nag-script
apt --reinstall install proxmox-widget-toolkit &>/dev/null
Not after each install a simple sed removes the nagging from webui javascript and your life is less stressful again.
Cluster
Clustering in proxmox is made very simple. The only troubles which I experienced with this, was that I did not use the root user, but the one I created which caused error (easily fixed by enabling the root, running cluster join and disabling the user again). Useful features sahred in cluster environments (even though may be replaced by the manager - if interested see its roadmap here) include resource and directory mappings, notifications and disks/backups themselves.
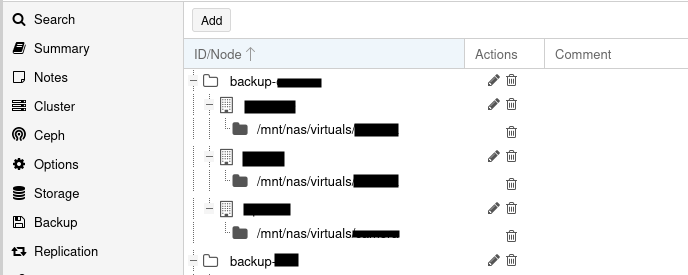
Directory mappings
Shared directories on shared disks were a bit more difficult to setup previously, when I worked with older versions. Now I setup a shared folder on each node and share it using directory mappings, so that each node has access there and each guest has its own backup folder. I mainly use this for backup and sharing common files between each virtual machine.
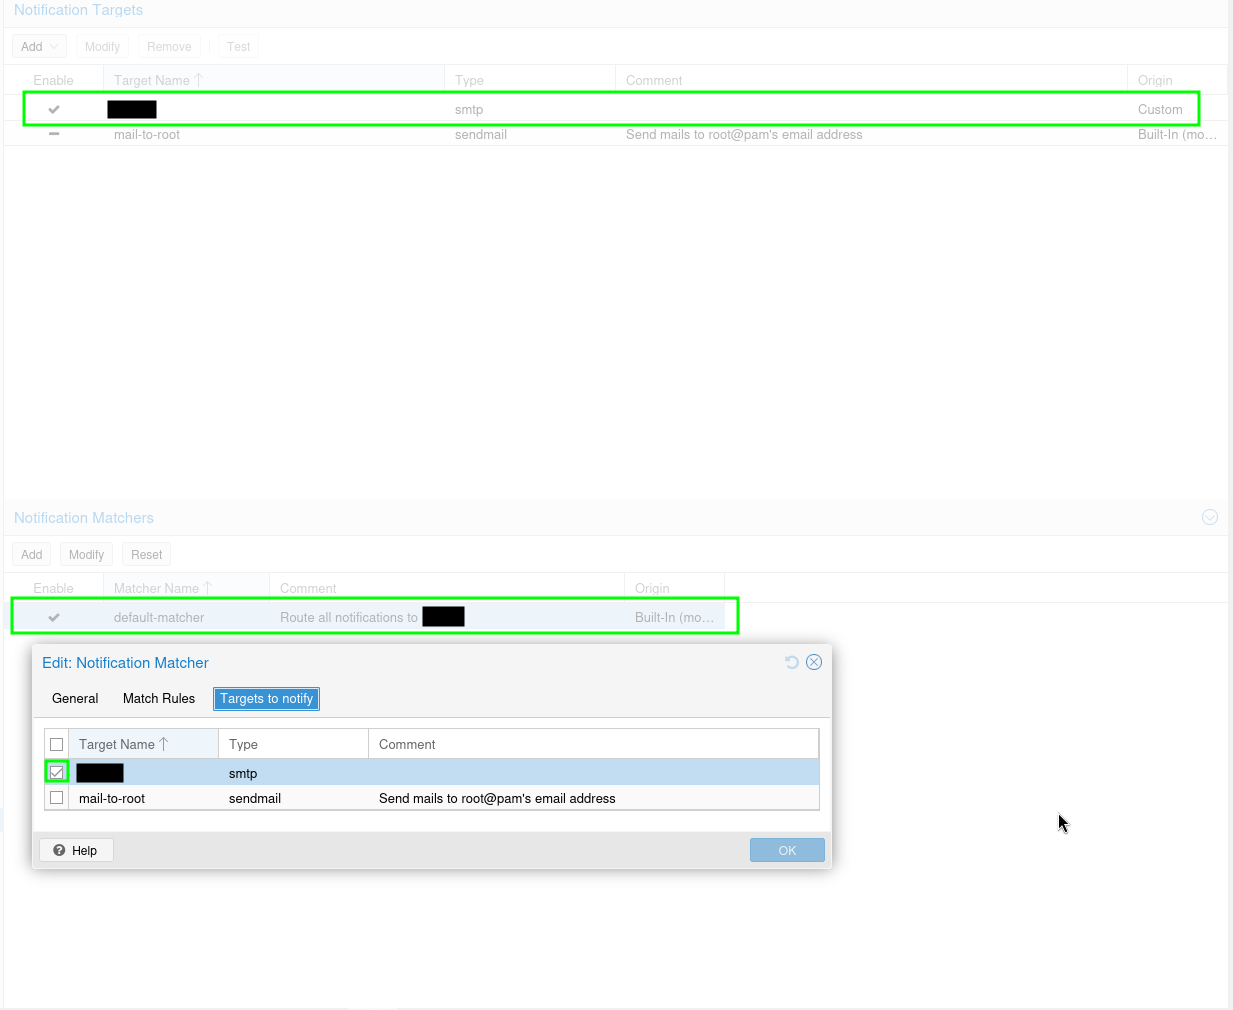
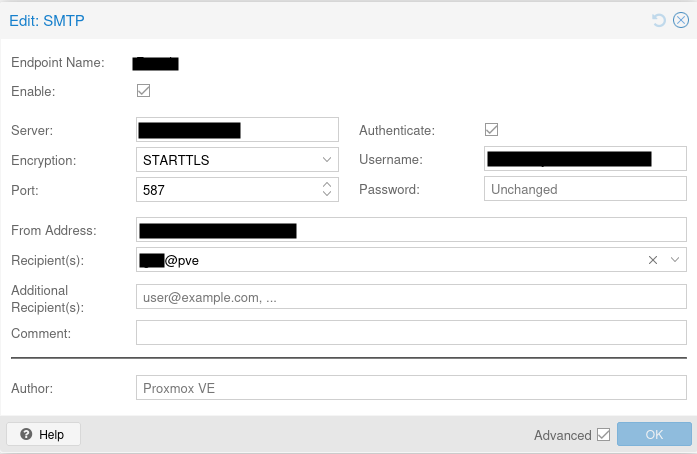
Notifications
For the notifications themselves I use SMTP which sends emails to each administrator with valid email address saved in proxmox.
Backup
Using a shared disk as a single backup solution is not the best practice and therefore I also have a few CRON jobs which regularly backup the data to internal disks. These second layer of backups do not hold and live data, and are in the machine just for the sake of having space in the PC cases.
For the main backup I use a shared disk as mentioned above setup through the storage menu in the datacenter view. As for the backup settings themselves I run them once a week and I have a notification in case both failure and success (just to be sure everything ran correctly).
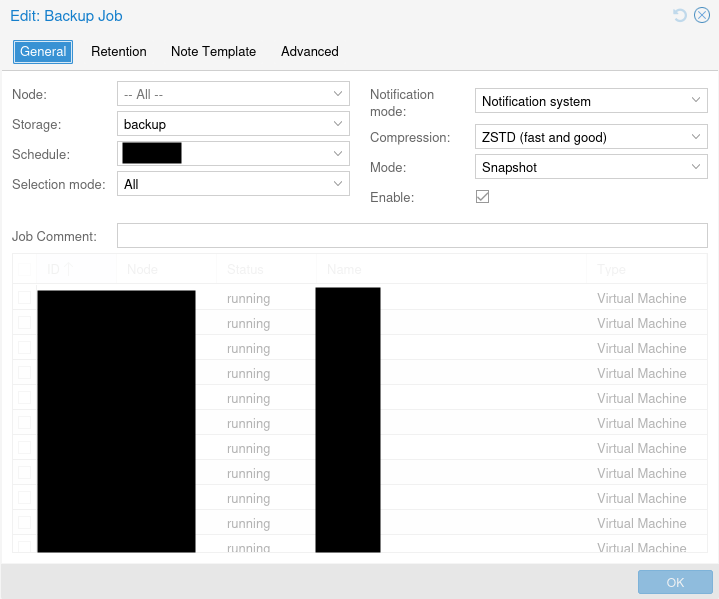
Also as mentioned above I have a simple cron job which runs before this backup, so it copies the last state of the backup to internal disk on some of the nodes.
# cronentry itself - replace 42's with real numbers / text please
# m  h  dom mon dow   command
 42 42  *   *   42     /usr/bin/rsync -urv --progress --delete-before /mnt/pve/backup/dump /mnt/pve/fourtytwo/ >> /root/fourtytwo.log 2>&1
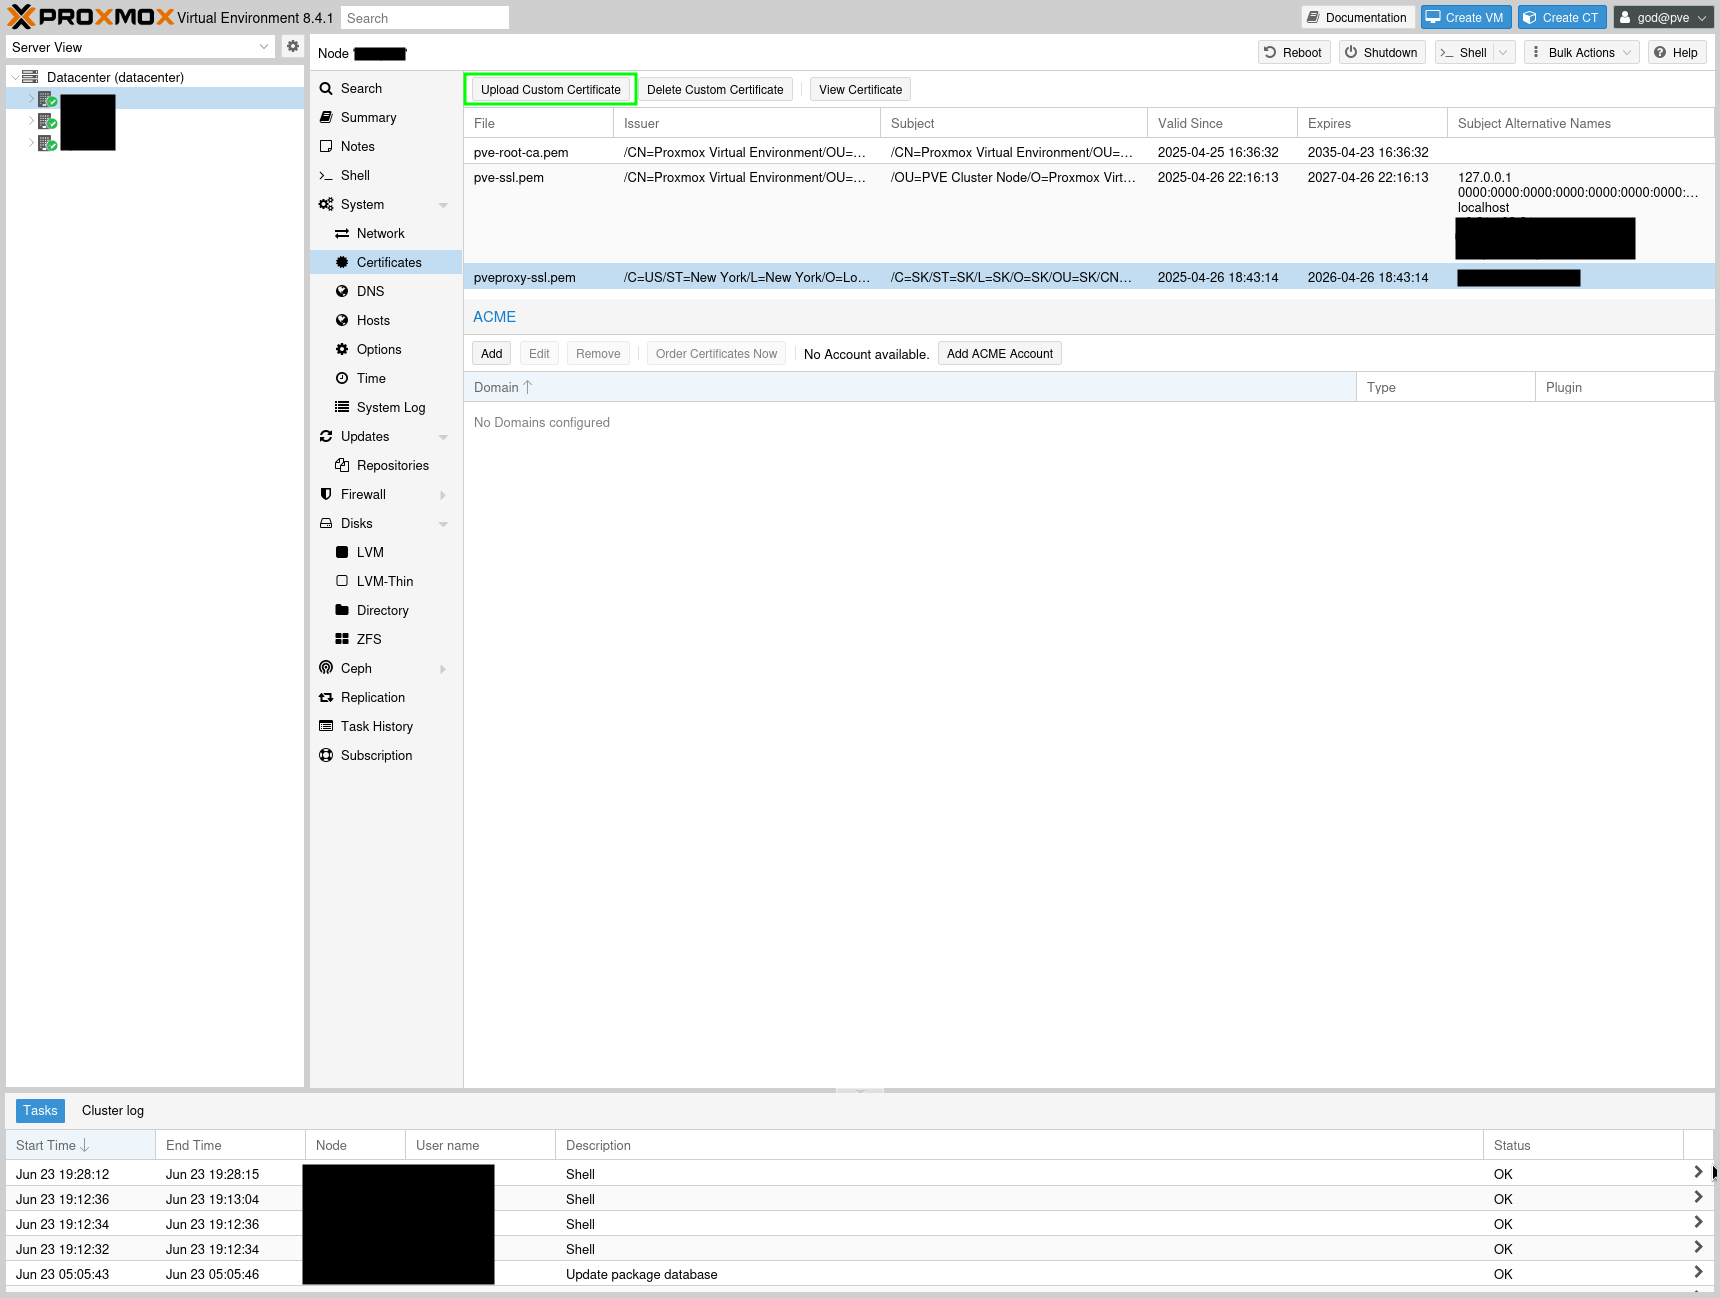
Certificates
In my previous posts I mentioned setting up your own certificate authority (here), which can then be used internally for your websites. In this case proxmox lets you import your own CRT which will be used for the WebUI. The process itself is pretty simple, just export the private and public key into a file and upload it to the following location in your datacenter as shown on the image below. The certificate is specific to each node, so the settings can be found under node/system/certificates.
Virtual machine
Virtual machines themselves have a lot of customization options, settings and firewall rules which can be highly useful if you want to speed things up or secure them.
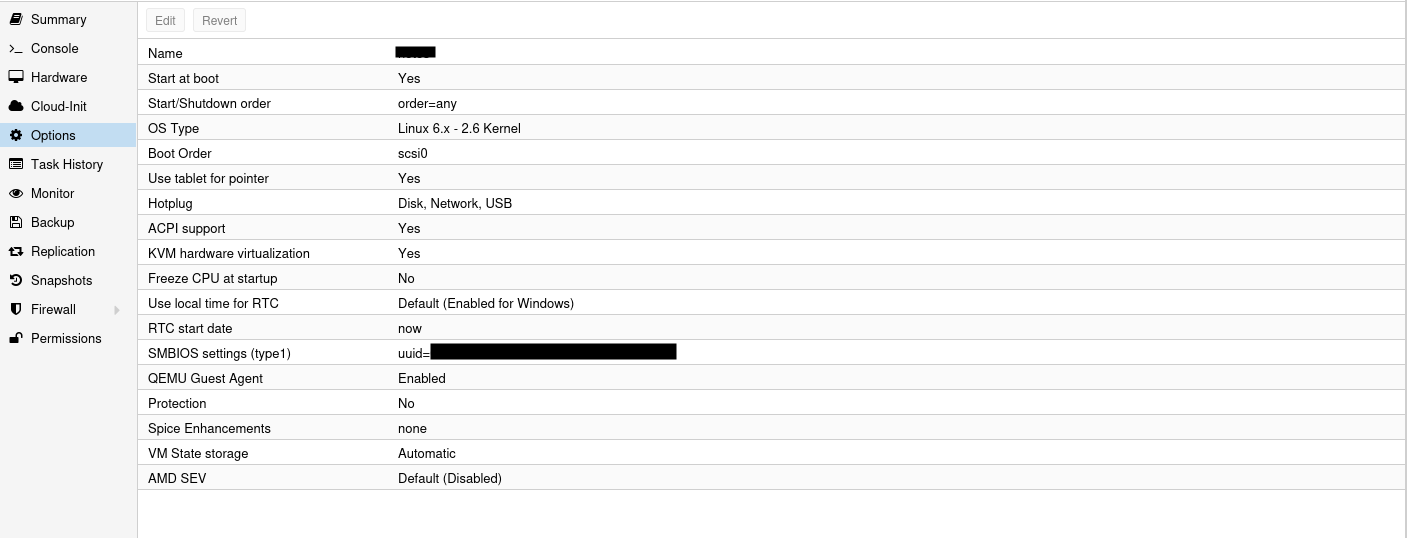
Options
Lets start with the simplest ones, options. In here you can set various settings of the machine which are not tied to a specific hardware. For simplicity I only include those, which I find the most interesting, and other settings for linux VMs will be captured in the image below.
- Start/Shutdown order - here you have to be precise in ordering the machines and always have to count from 1 to X without skipping a number (increments by one).
- Boot order - I rather disable any unused boot types, so the only item left there is
scsi0(the boot drive, uncheck CD/DVD and network). - QEMU guest agent - install on the guest and check yes here, so the host has more detailed / acquired information about the guest itself.
- Protection - in case you are accidental clicker / misclick a lot then set it to
yes. In other cases it can be useful if you want a better separation of user roles / privileges. This will disable the remove VM and remove disk operations (cited from here). - Spice Enhacements - if you use spice compatible remote viewer.
Hardware
For hardware I only focus on hard disks / disks attached to the machine and making sure I use UEFI. The second should / has to be set when setting up the VM itself, the first along with its options is explained below.
For backup purposes and since I don't have the most complex disk structure I tend to use qcow2 format, which supports snapshots. The only thing I find annoying, which is not set on by default is discard checkbox. Controls whether to pass discard/trim requests to the underlying storage (cited from here again). In simple terms, if you delete something on the guest it also frees space on the hosts disk.
If you plan on using firewall, then don't forget to check firewall on each interface you want to be protected ;).
This post was written without the help of AI.