Certificate Authority in SOHO
Posted on 14 May 2025 by Mino — 4 min

What ?
This post focuses on HTTP/+s certificate creation with local certificate authority using MikroTik device and software which had to have additional configuration modified in order to accept the CA (e.g. Certificate Authority).
Why ?
It's so nice and satisfying to see a lock icon in the top navbar of a page in your browser. Personally when I see the hateful page containing "Your connection is not private" I immediately stop using that site, unless I really have to. Anyways beside this it is also really easy to setup and the only thing you have to do is replace the certificate every 365 days (and on Mikrotik device you can even set a notification for that, next blog may be about that, so stay tuned if you are interested).
How ?
There are multiple solutions to this topic. For simplicity and my inability to learn openssl cli I tend to use MikroTiks built-in certificate management system.
cli
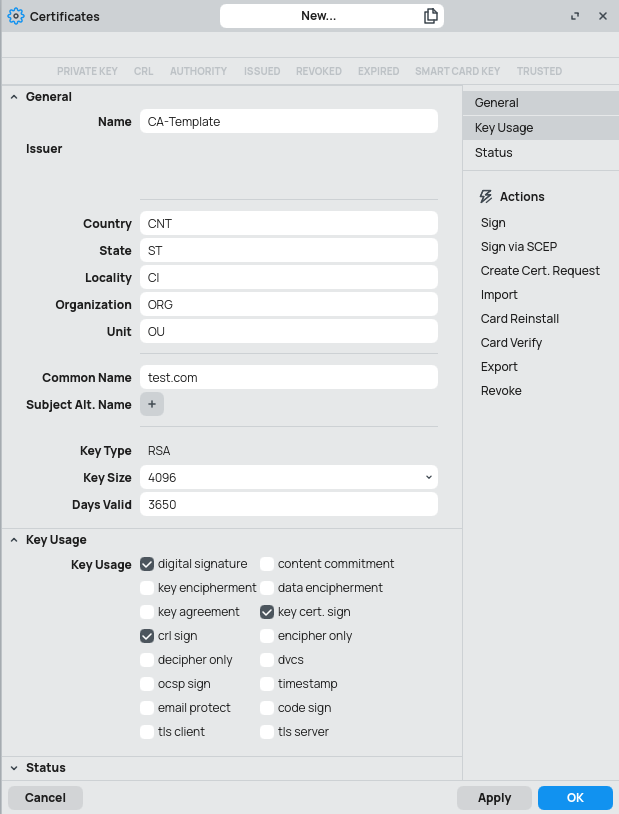
Create Certificate authority using the command below.
/certificate
add name=CA-Template common-name=CAtemp key-usage=key-cert-sign,crl-sign
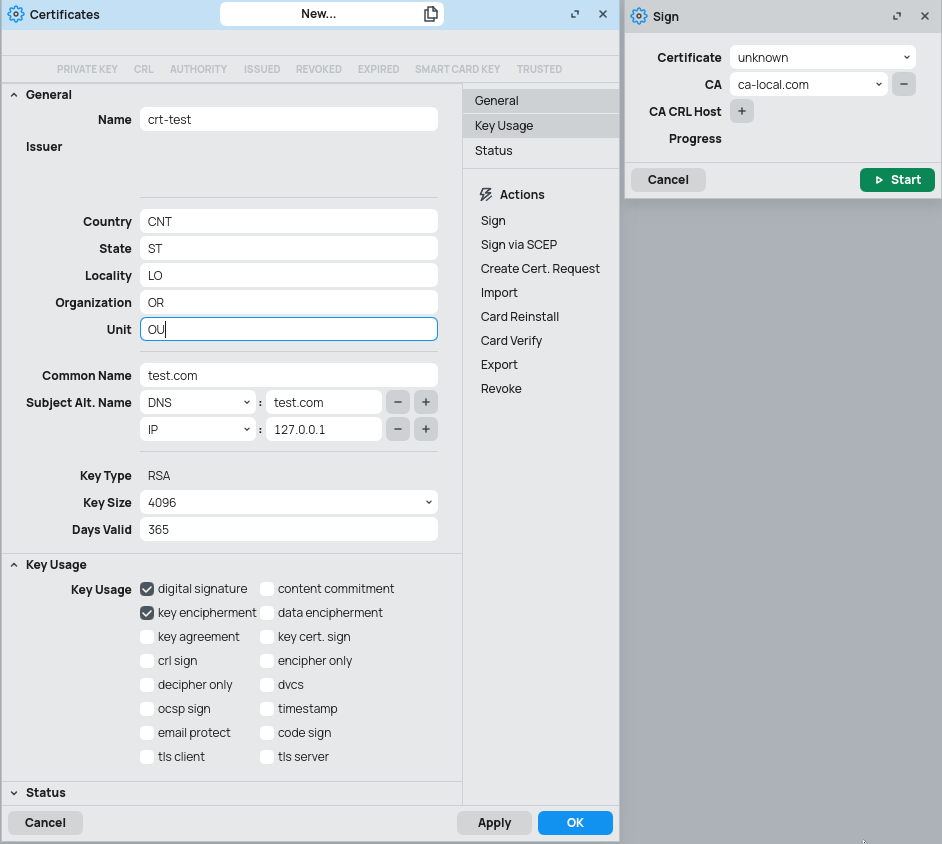
After creating the CA, use the following command to issue a certificate and sign it by this CA (thus trust it).
/certificate
add name=test common-name=test.com subject-alt-name=DNS:test.com key-usage=digital-signature,key-encipherment days-valid=365 key-size=4096
sign test ca=CA-Template
gui
- Find the certificate management feature in WinBox UI
- Create CA
- Create Certificate
notes
- Set
days-valid/Days Validto 365 days or lower (f.e. iPhones don't like certificates valid for longer 2 years) - Set the
key-size/Key Sizeto 4096 bits or higher (2048 is too low) - Specify DNS and IP
subj-alt-name/Subject Alt. Name, just in case someone likes to type numbers instead of DNS records (or someone forgets to assign proper DNS record...)
Problems...
When using custom certificate authority I encountered multiple issues. To sum up my problems and corresponding solutions they are divided into sections based on the system/software, where the problem was encountered.
Windows 10 / 11
Kind of easy one as you can imagine, but to keep everything in one place and start with the easier one please follow the guide below.
- Download public key of the CA (e.g. Certificate Authority)
- Double-click the file
- Follow the guide from images below
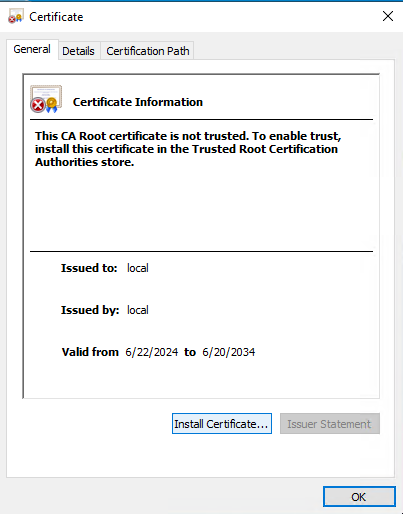
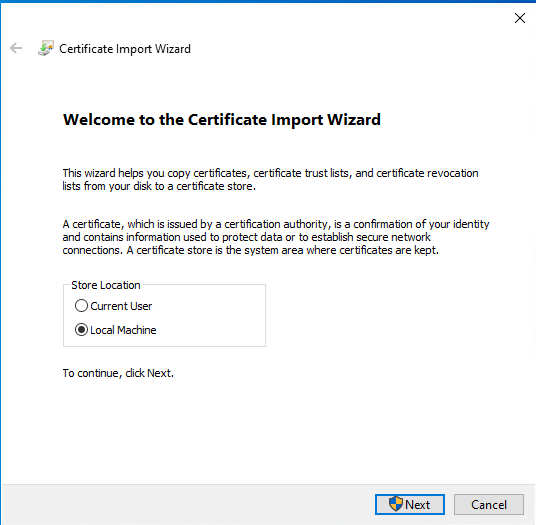
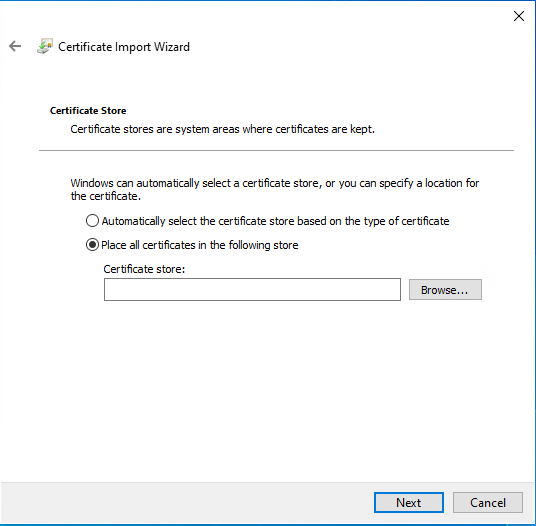
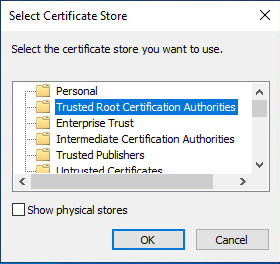
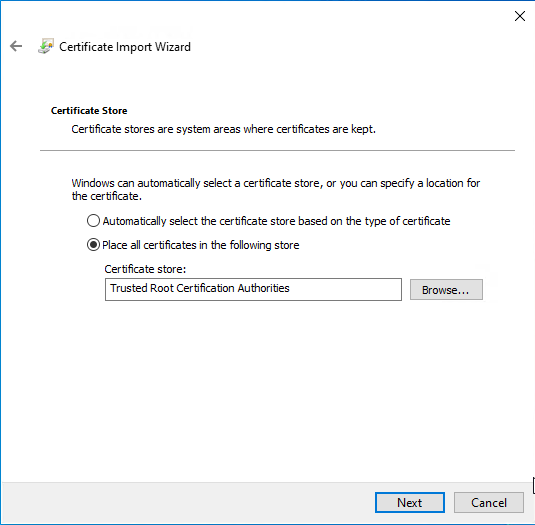

- Restart the system (not required, but eliminates other issues that can raise later on)
Docker
If you use custom docker registry and you have it deployed behind reverse proxy, than setting HTTPs is pretty simple. The only thing you need to do is upload public key of the CA to the following path and restart docker service:
sudo -E bash
mkdir -p /etc/docker/certs.d/registry.test.com/
touch /etc/docker/certs.d/registry.test.com/ca.crt
systemctl restart docker.socket docker.service
Debian
One of the easiest solutions to this problem. I also restart the system after setting certificates, but again for web browsing it seems useless to restart the whole system, I just restart the browser.
sudo mkdir /usr/local/share/ca-certificates/local-ca
sudo touch /usr/local/share/ca-certificates/local-ca/ca.crt
sudo update-ca-certificates
Joplin
For joplin you have to navigate into options (in gui or by using shortcut ctrl+comma). Under settings Synchronization/Show Advanced Settings/Custom TLS Certificates you can specify a path to folder, which contains custom CA.
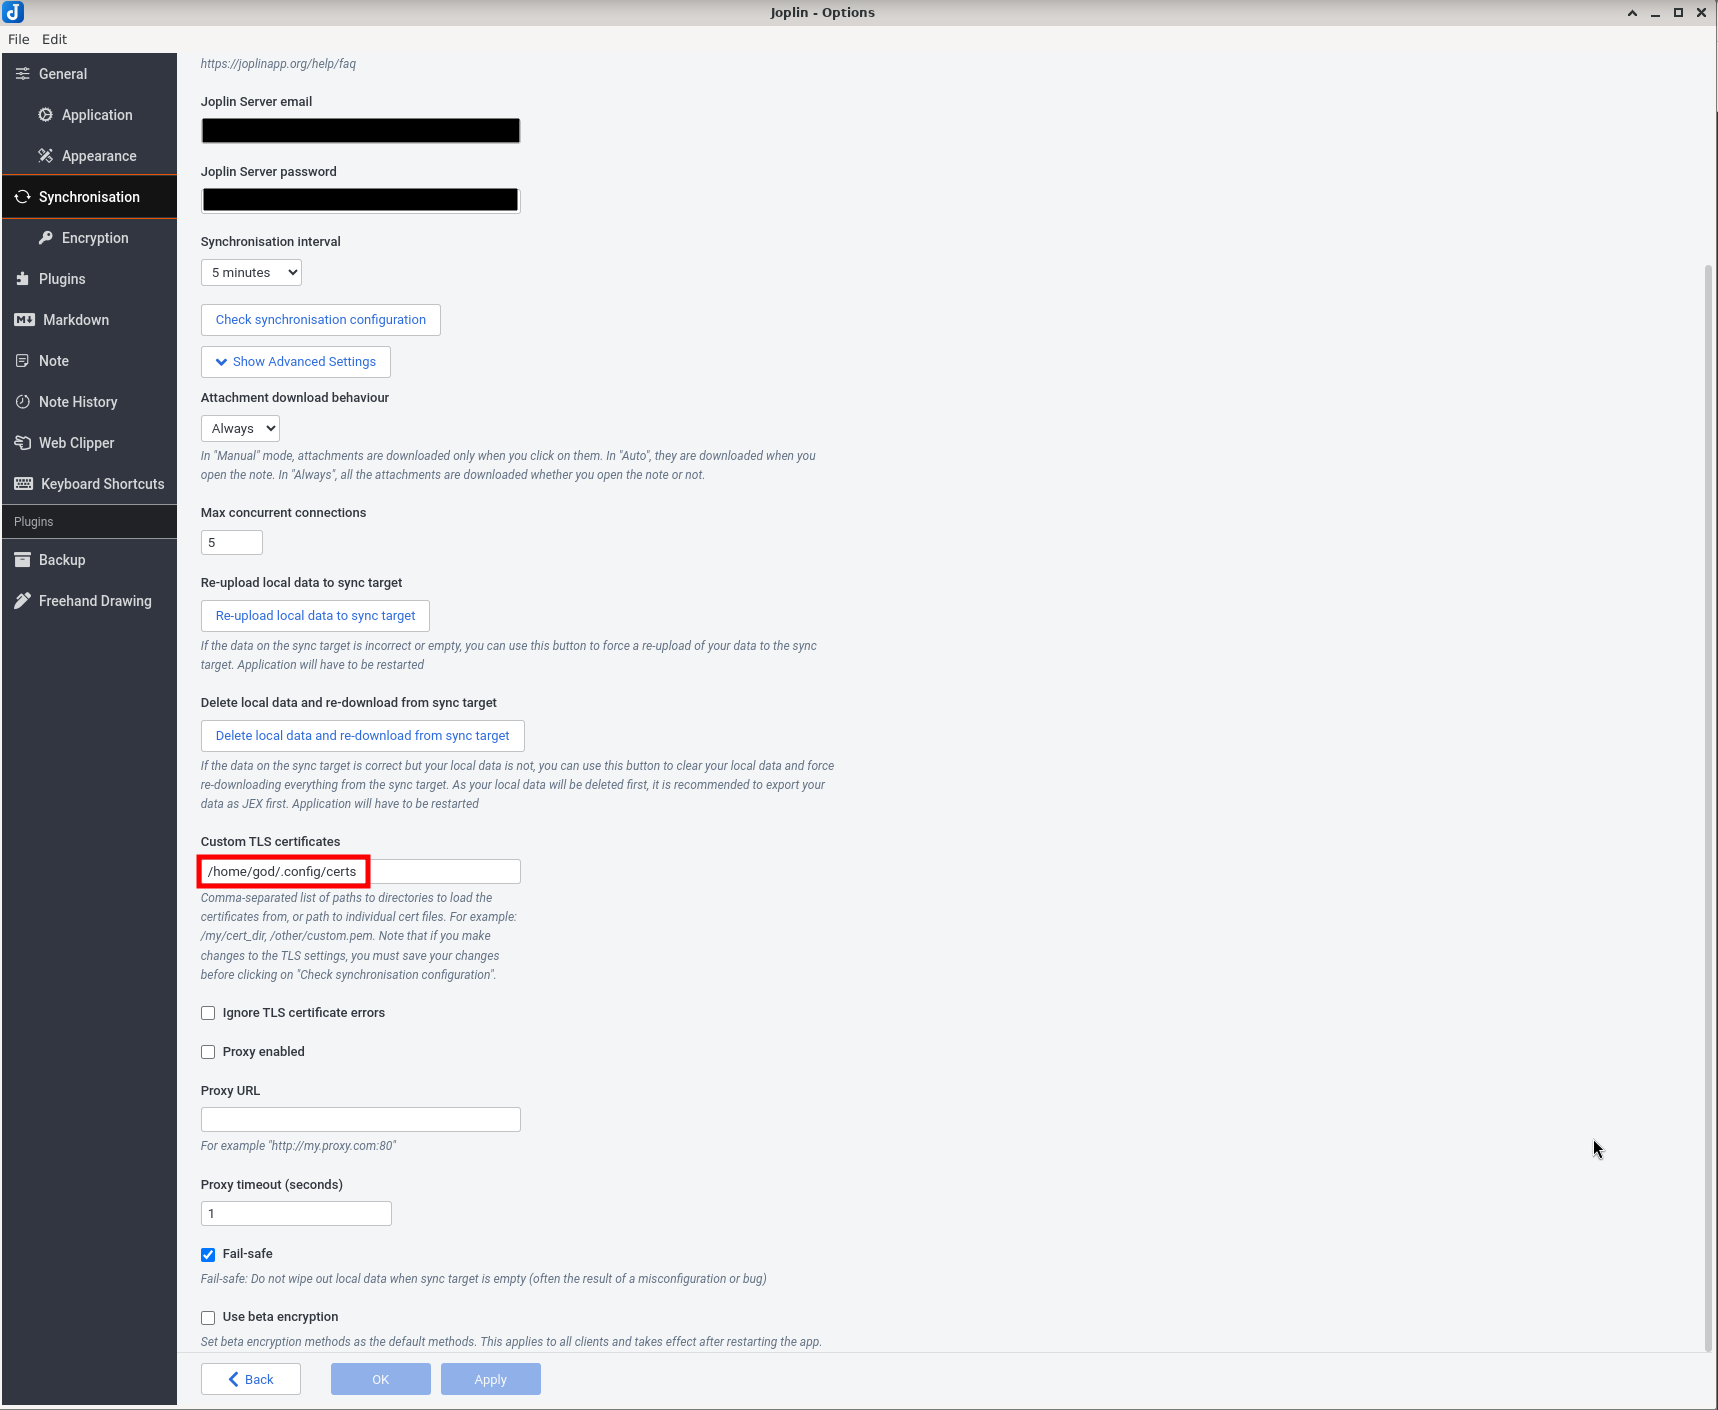 This directory contains only the certificate authority.
god@laptop 2025-05-13 22:01:45 (☺ 0, #:6, ⟲ 7388,⚒ 0)
/home/god/.config/certs -> l
total 4.0K
-rw-r--r-- 1 god god 1.1K 2025-04-04 14:44:52.792285233 +0200 ca.crt
Bitwarden
One of the more complicated tools (at least in terms of research) to accept custom certificate authorities. The solution can be described by the command below and its original author is listed there too. Thank god for him!
certutil -d sql:$HOME/.pki/nssdb -A -t "C,," -n ca -i ~/.config/certs/ca.crt
More recent solution (tested @2024, but did not work in my setup)
export NODE_EXTRA_CA_CERTS=~/.config/Bitwarden/certificate.crt
This post was written without the help of AI.