Networking saga Part 1 - Interfaces
Posted on 22 May 2025 by Mino — 6 min

Simple Ethernet, VLAN, bonding and WiFi configuration with some notes on security. Please use the following decision table to decide which sections of this post to read.
| Description | Sections |
|---|---|
| Simple configuration without multiple sub-nets | Ethernet + WiFi + Bridge |
| Configuration with multiple sub-nets and basic firewall | Ethernet + WiFi + Bridge + Lists |
| Complex configuration with sub-nets, firewall rules and bonding interfaces | Just read through it at this point ... |
Ethernet
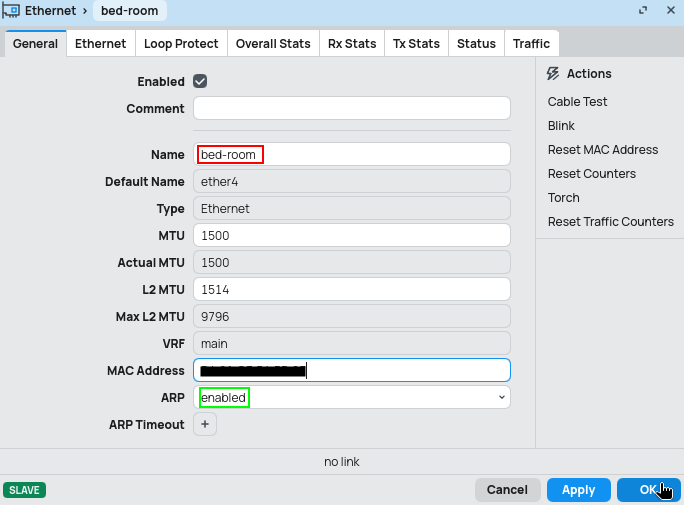
Physical interfaces (Ethernet) are pretty easy to configure in MikroTik, if you don't require VLANs or bonding. As such please use the following image as a reference, with just 2 little tweaks.
Name(red) - use corresponding name, I tend to use location or purpose of that interface.ARP(green) - are you planning to use DHCP server with static addresses assigned through it ? Then I choosereply-onlyto enforce this assignment, otherwise (DHCP with dynamically assigned addresses - you use IP Pool on the DHCP server) I useenabled.
WiFi
I followed this guide, when setting up WiFi at home. Small deviation from that is, that I don't use my WiFi device as a router, but only as an Access Point (AP).
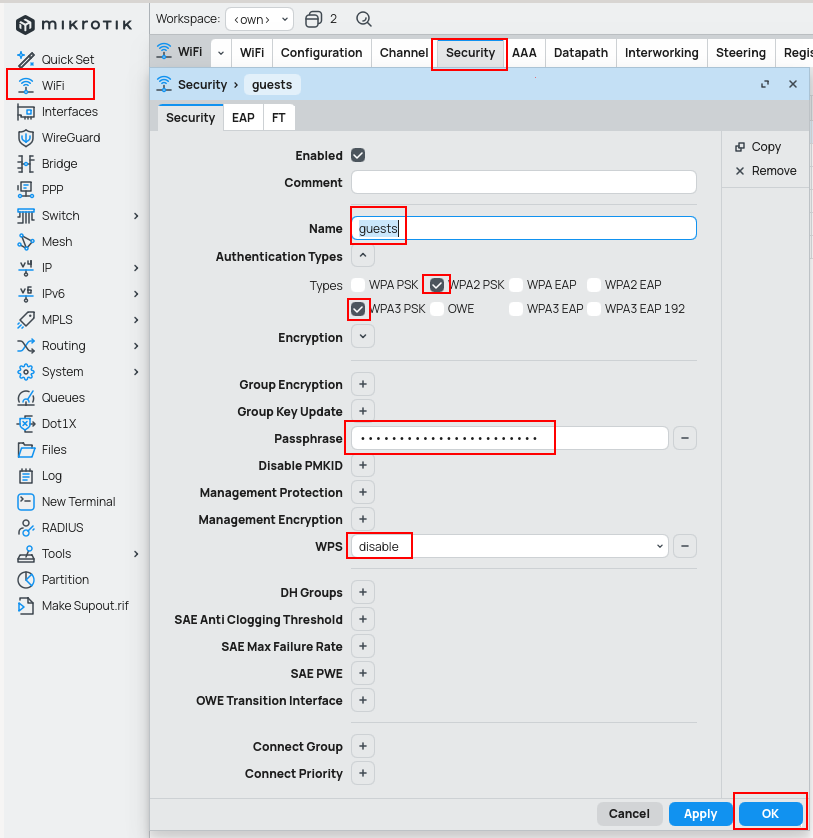
Security
First the guide recommends setting-up security - password, encryption and so on. For compatibility purposes I use both WPA2 and WPA3. If that is not your concern, use only the latest version WPA3. Other then this I only setup Passphrase and WPS to disabled.
# taken from the guide
/interface wifi security
add name=common-auth authentication-types=wpa2-psk,wpa3-psk passphrase="diceware makes good passwords" wps=disable
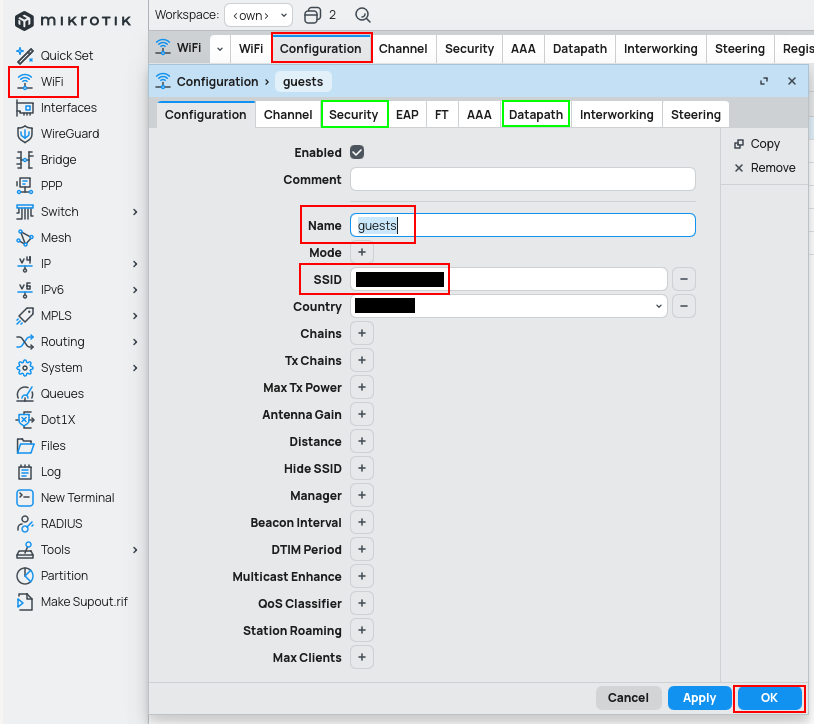
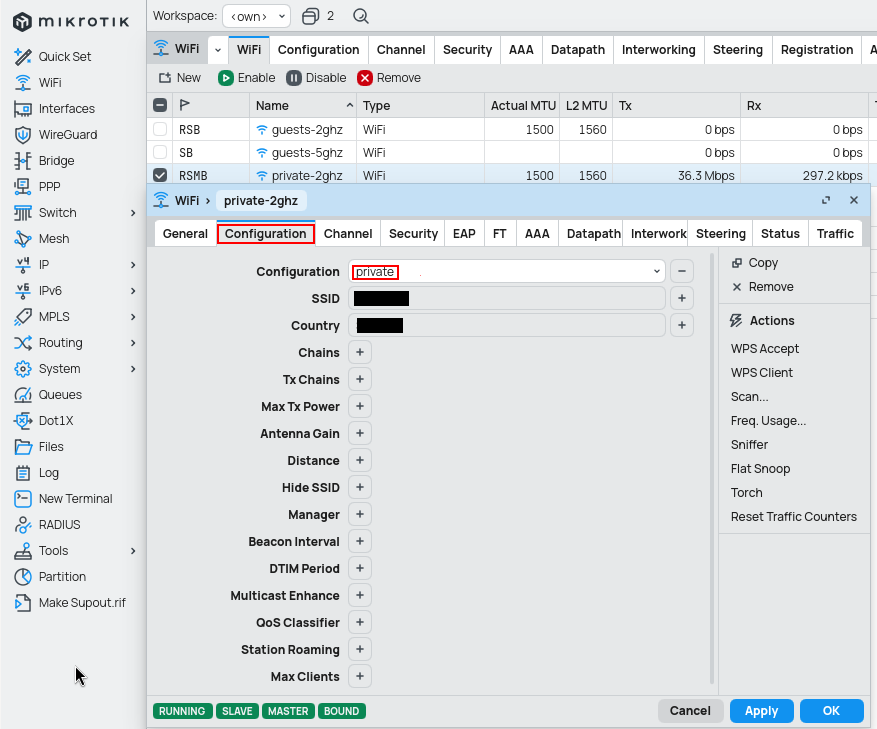
Configuration
Configuration profile helps you share security profile and other settings across multiple WiFi bands (2.4GHz and 5GHz). For security purposes I also enabled client isolation under Datapath settings (this can cause issues with Apple devices, f.e. with Airdrop or Airplay).
/interface wifi configuration
add country=Latvia datapath.client-isolation=yes disabled=no name=guests security=guests ssid=Guests
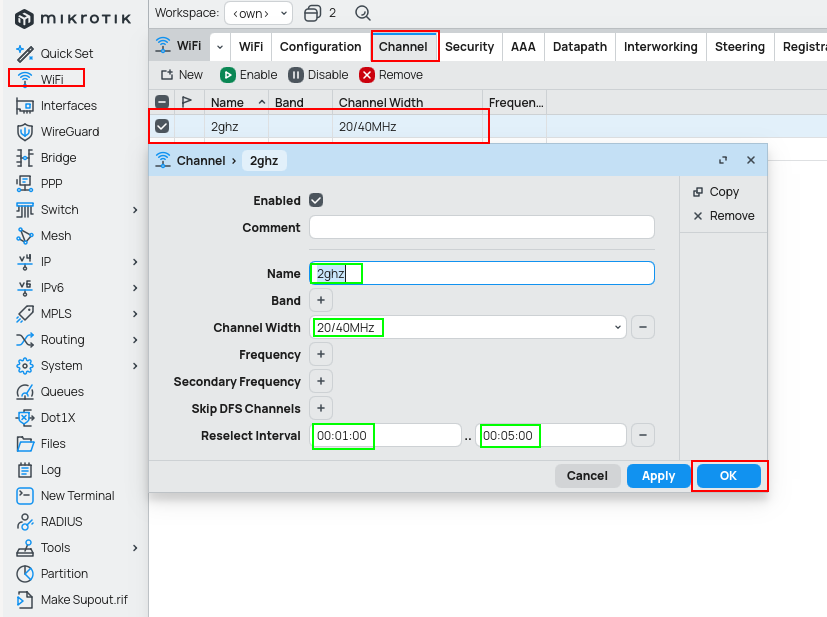
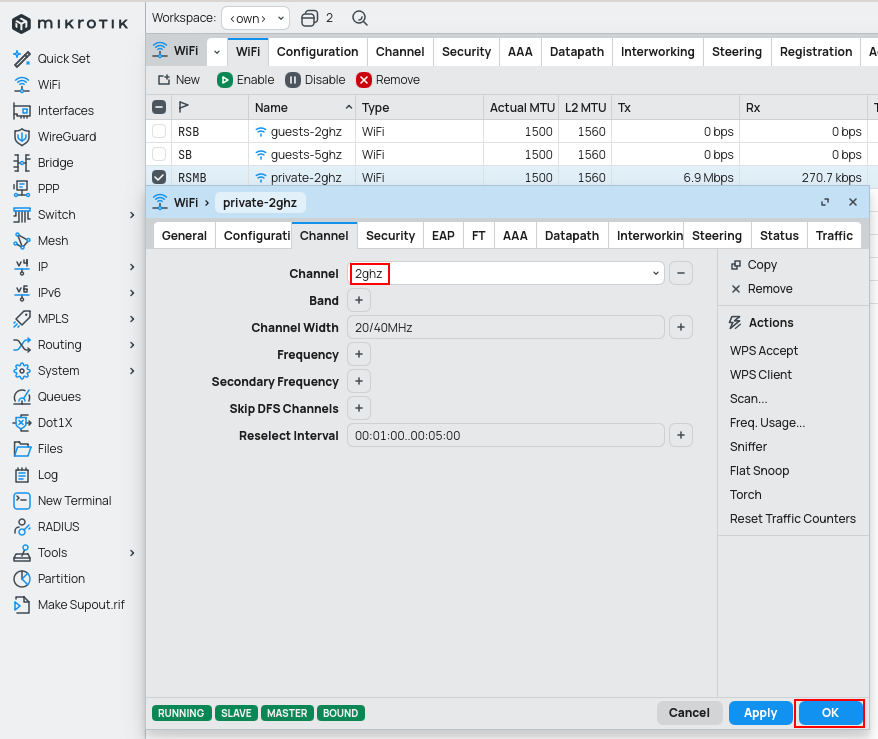
Channel
Set listening channels for the main WiFi interface.
/interface wifi channel
add disabled=no name=2ghz reselect-interval=1m..5m width=20/40mhz
add disabled=no name=5ghz reselect-interval=6m..10m width=20/40/80mhz
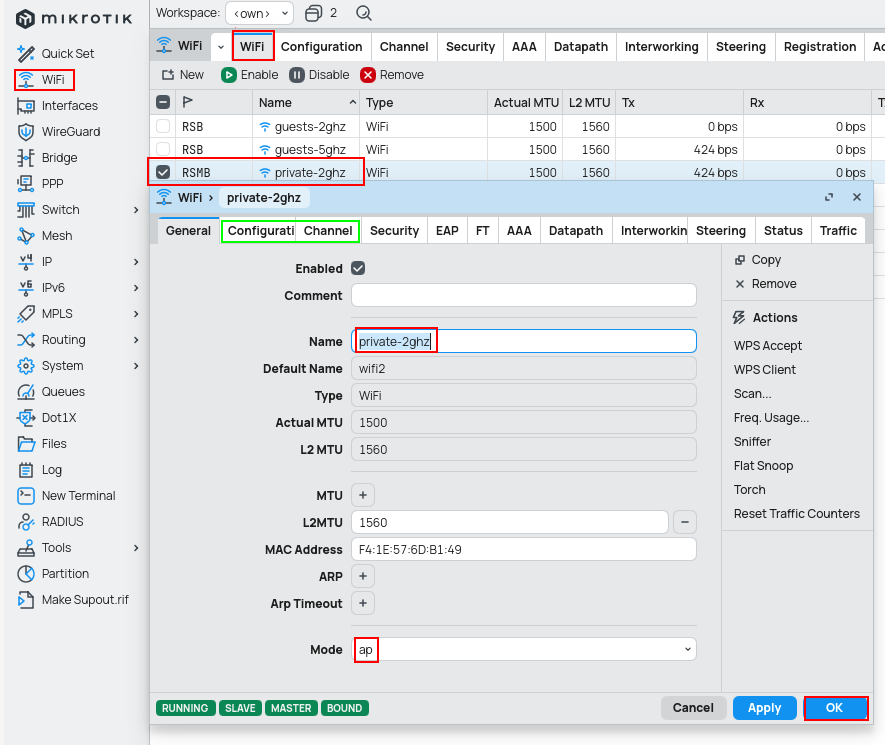
Putting it all together (WiFi)
Now its time to put all the profiles together to form a working interface. If want to have multiple WiFi's, then repeat the steps and see below the current image for a little change in this final step. Also having multiple WiFi interfaces involves multiple VLANs (if you have separated router and WiFi AP, otherwise be happy and enjoy more secure network).
/interface wifi
set [ find default-name=wifi2 ] channel=2ghz configuration=private configuration.mode=ap disabled=no name=private-2ghz
set [ find default-name=wifi1 ] channel=5ghz configuration=private configuration.mode=ap disabled=no name=private-5ghz
Other interfaces use the master-interface and have to be set twice (for 2.4GHz and for 5GHz).
/interface wifi
add configuration=guests configuration.mode=ap disabled=no mac-address=F6:1E:57:6D:B1:4C master-interface=private-2ghz name=guests-2ghz
add configuration=guests configuration.mode=ap disabled=no mac-address=F6:1E:57:6D:B1:4D master-interface=private-5ghz name=guests-5ghz
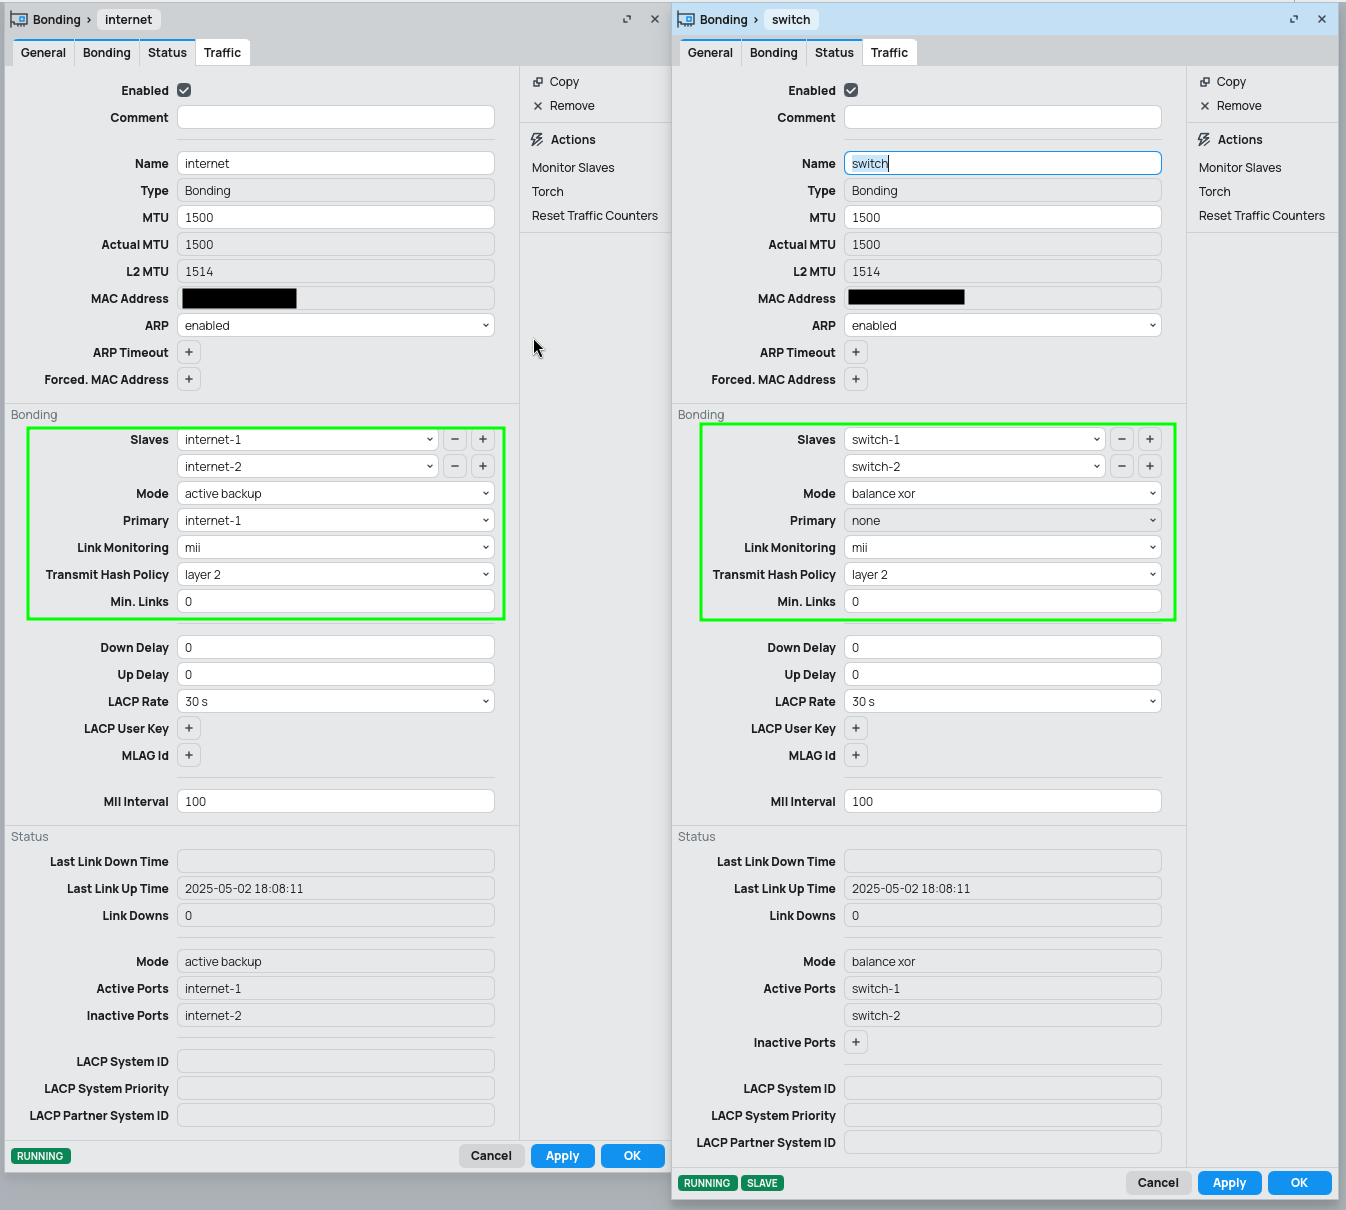
Bonding
To ensure higher availability and throughput Mikrotik uses the name bonding, which in Cisco terms is EtherChannel. There are multiple types of bonding, some of them requires configuration on both ends, some of them not (so can be used with dummy / unmanaged switches or home ISP routers). Below is list of the types with their suggested usage based on my little experience.
| Type | Usage | Notes |
|---|---|---|
active-backup |
Dummy switch | Just for the purpose of being safe in case one of the interfaces / cables goes down |
balance-xor |
QNAP and Debian and RouterOS | I use only the layer-2 so the interface stays hardware accelerated |
Feel free to use also other modes of bonding, but these 2 are the best ones I was able to find and use, run stable and without any issues between QNAP, Debian (Proxmox) and RouterOS.
VLAN
Both switch and router have almost the same configuration, just with a small adjustment on the router, which also needs a VLAN interface, not just bridge configuration. In this section the VLAN interface will be detailed a little bit. The real deal with VLANs is set under Bridge configuration below.
/interface/vlan/add arp=reply-only interface=bridge name=virtuals-zabbix vlan-id=2

To have a functional management VLAN interface on switch or WiFi AP, create VLAN also here and set this interface to dhcp-client mode (under IP/DHCP Client).
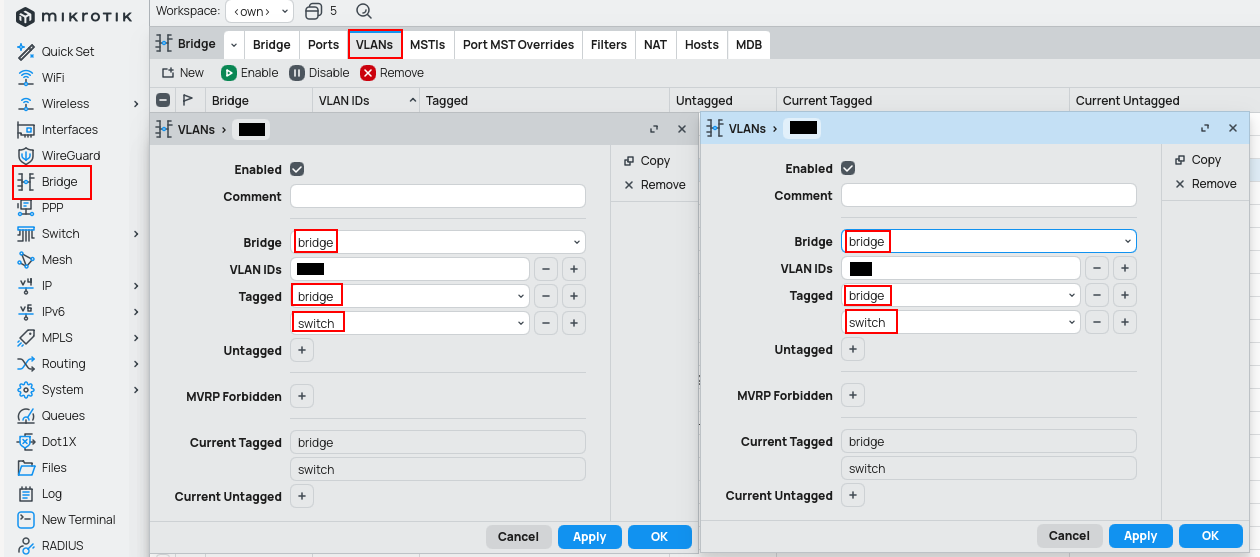
Bridge
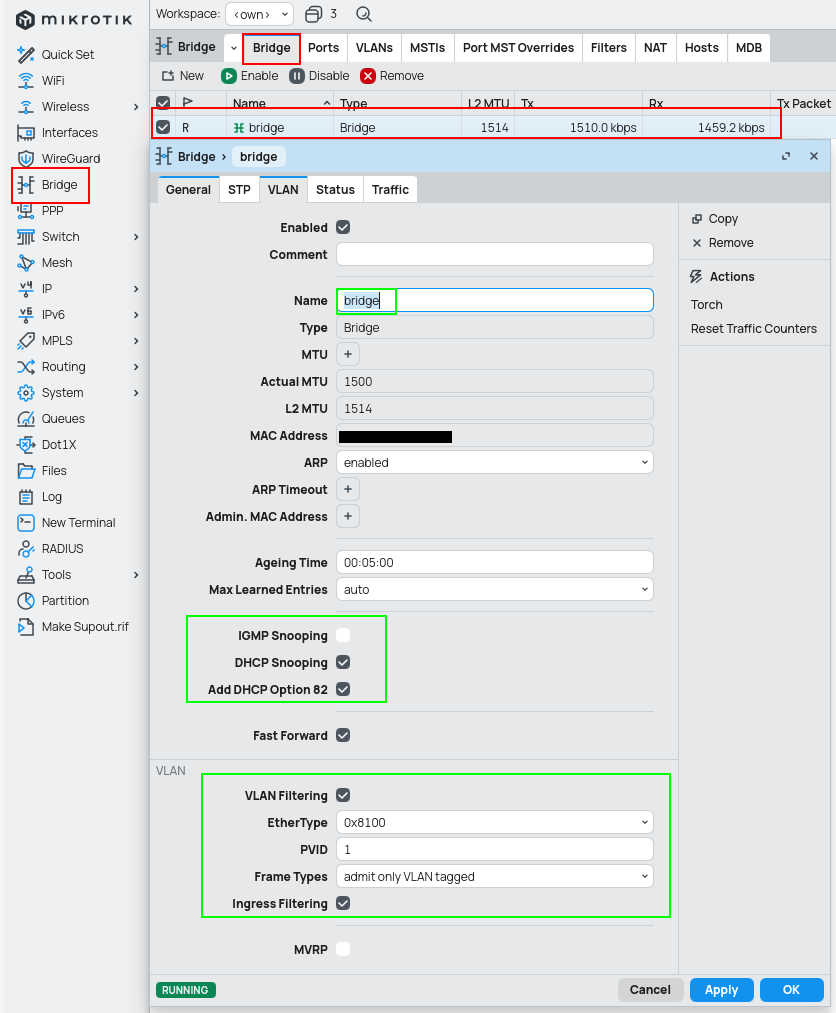
Here all the magic regarding VLANs on Mikrotik happens. I found RouterOS being one of the more difficult to work with regarding VLANs and I have worked with Cisco, Fortinet and SwitchOS (Mikrotiks operating system for switches).
NOTE: be very careful when enabling vlan-filtering=yes and rame-types=admit-only-vlan-tagged. Since you can't have safe-mode turned on (you get disconnected even if its successful and even if not), so you have to have a backup interface in case something goes wrong. The backup interface will be discussed in a later post, since this post is already too f*cking long.
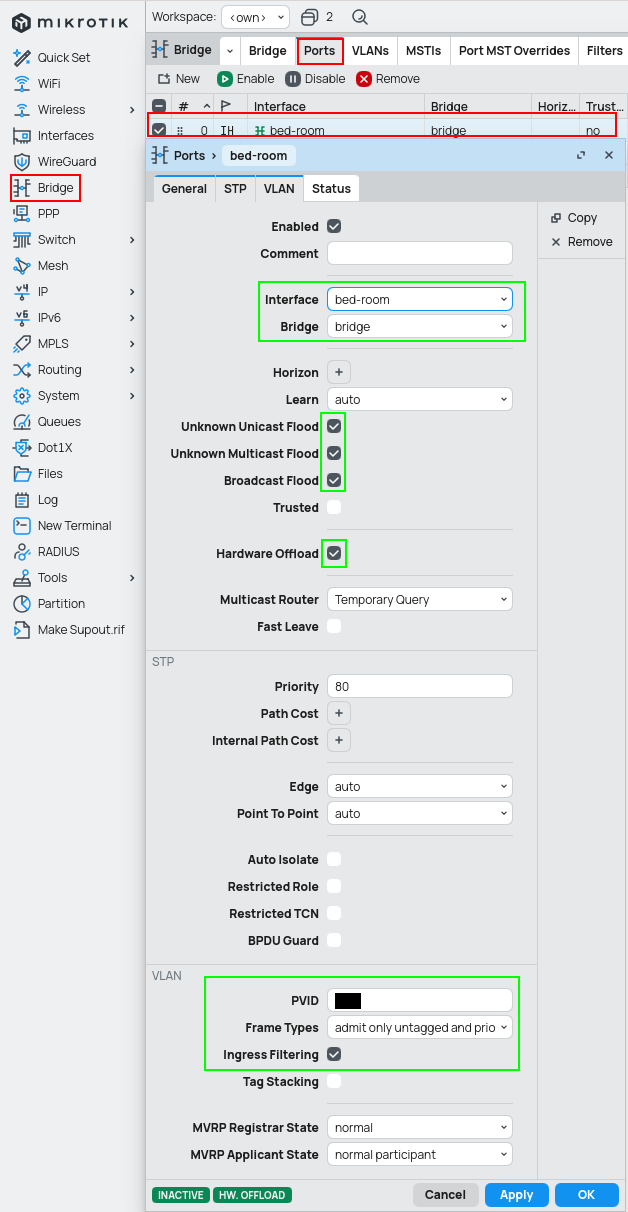
Access port
Port which accepts packets without VLAN mark and adds one based on the configuration. For such interface please follow the CLI / GUI guides below.
/interface bridge port
add bridge=bridge frame-types=admit-only-untagged-and-priority-tagged interface=bed-room pvid=3
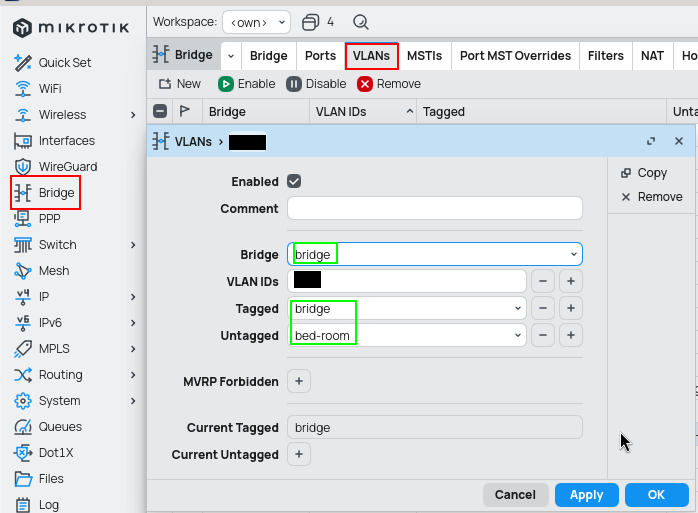
/interface bridge vlan
add bridge=bridge tagged=bridge untagged=bed-room vlan-ids=3
/interface bridge
add add-dhcp-option82=yes dhcp-snooping=yes frame-types=admit-only-vlan-tagged name=bridge vlan-filtering=yes
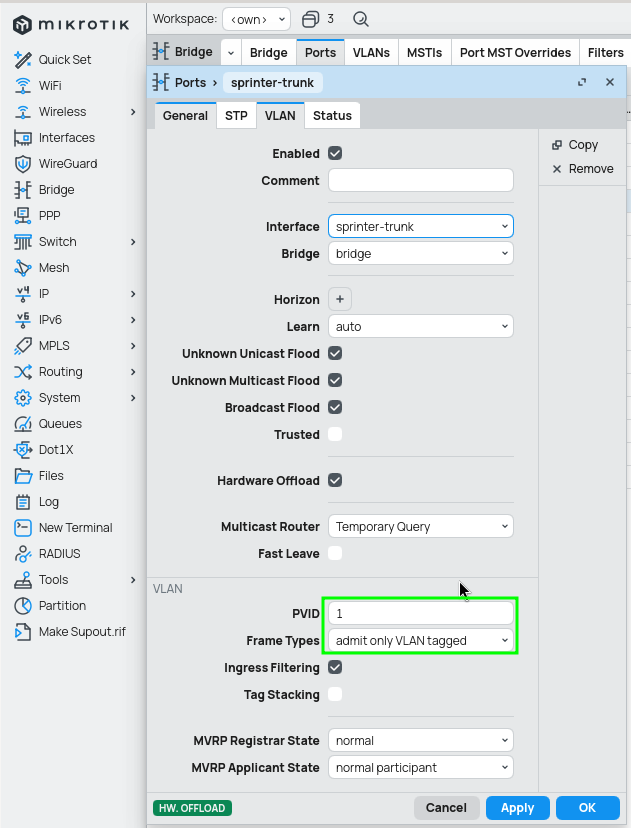
Trunk port
For a trunk interface the difference is only in allowing multiple VLANs through the interface itself and to actually allow them in the ports configuration. A quick advice I read somewhere (probably official mikrotik documentation) is to configure each VLAN separately, so you can more easily change interfaces and don't have to think about adding new VLAN to a list of interfaces which you did not mean to.

Difference
Add bridge to the tagged list only if you want the device to see the traffic whats happening there, otherwise add only interfaces.
Switch
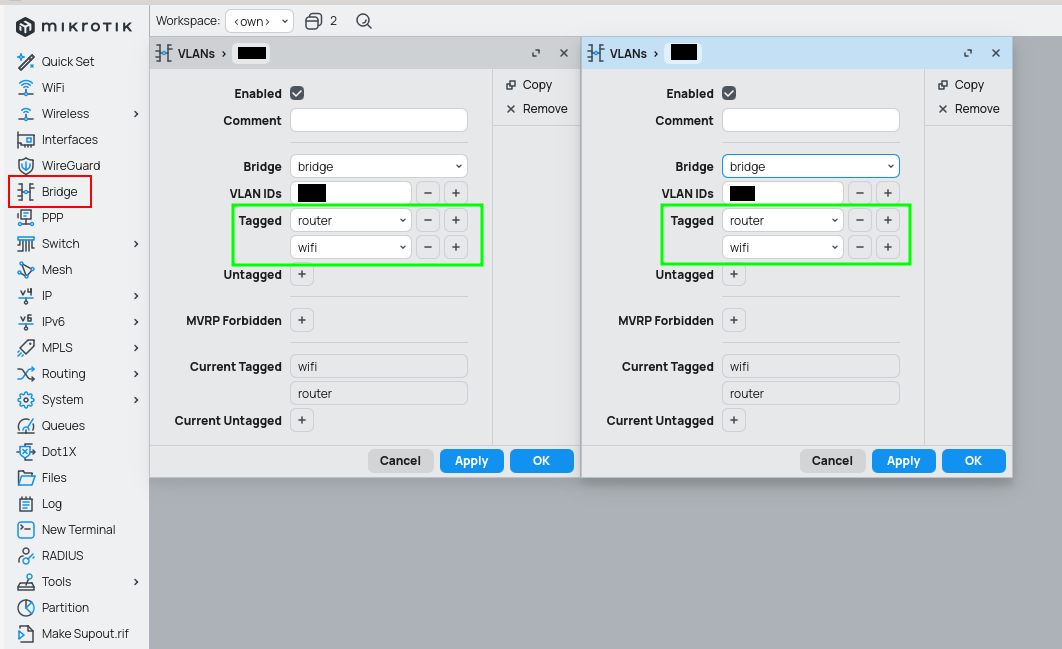
Router
WiFi VLAN
A small note regarding WiFi and VLANs. I set the VLAN ID on bridge, but the same result may be achieved when set on the interface itself.
Other security settings
I enable firewall for all bridge related operations, so that all traffic is directed to IP firewall.
/interface bridge settings
set use-ip-firewall=yes use-ip-firewall-for-pppoe=yes use-ip-firewall-for-vlan=yes
Lists
I use a few of custom lists, which are then used in IP firewall. Following lists may be also relevant for your use-case.
local- all local interfaces, includemanagementandprotectprotect- special interfaces, in simple terms serve as DMZ, don't have access anywhere else nor to the internetmanagement- management interfaces, to access SSH, RDP, WinBox ports on various devices
This post was written without the help of AI.